There is something wonderful about having fresh homemade bread in your kitchen. Whether you’re making a simple sandwich loaf, whole wheat bread, pizza dough, or experimenting with sourdough, a bread maker can make homemade bread much easier.
I used to make bread entirely by hand, but finding the time to knead dough, monitor rising times, transfer everything into baking pans, and keep track of the baking process wasn’t always practical. Once I started using a bread machine, making homemade bread became something I could do regularly without spending hours in the kitchen.
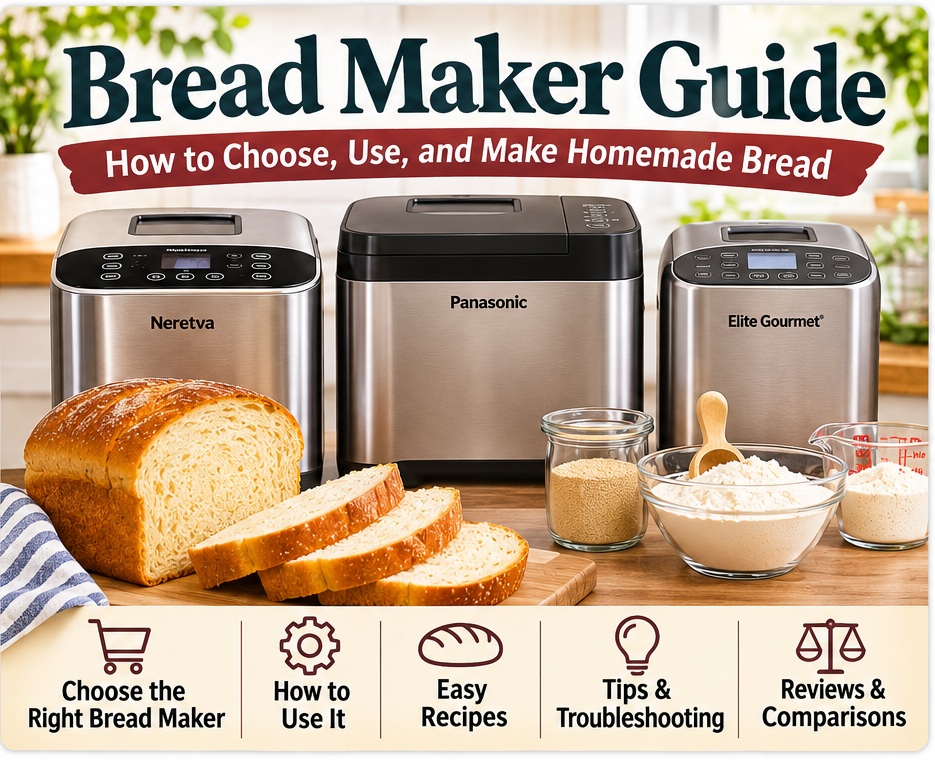
Bread Maker Guide: How to Choose, Use, and Make Homemade Bread
As a former professional chef, I’ve used and tested several bread makers, including Panasonic, Neretva, and Elite Gourmet machines. I’ve also experimented with different bread recipes, flour types, loaf sizes, and bread machine settings.
In this guide, I’m sharing what I’ve learned about choosing a bread maker, how bread machines work, how to use one, and some of my favorite ways to make fresh bread at home.
If you’re considering buying a bread maker or already own one and want to get more use out of it, this guide will help you get started.
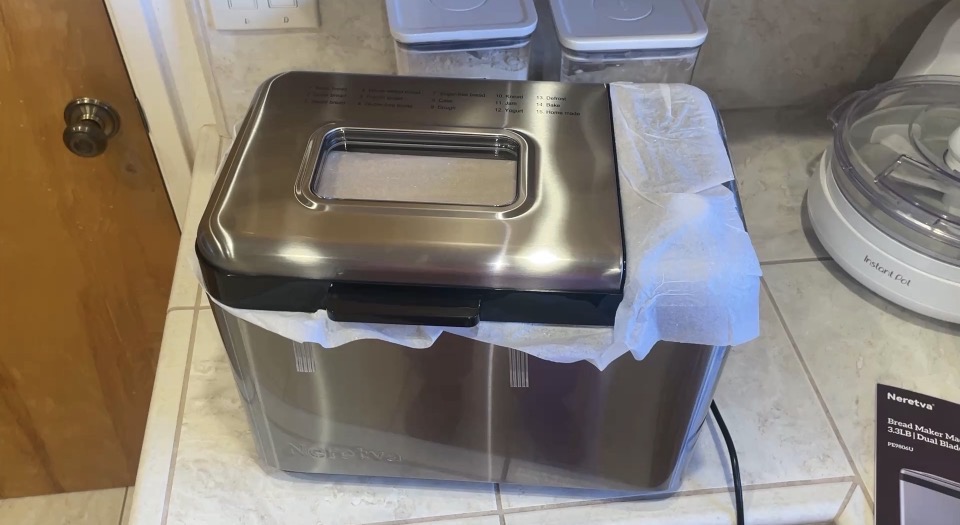
What Is a Bread Maker?
A bread maker, also called a bread machine or bread making machine, is an automatic kitchen appliance that mixes, kneads, proofs, and bakes bread.
Instead of making dough by hand and transferring it between mixing bowls, countertops, and baking pans, you add your ingredients directly into the bread machine’s removable baking pan.
The machine handles the rest.
Most bread makers have several automatic programs that control the kneading, resting, rising, and baking times. Depending on the model, you can select different loaf sizes, crust colors, and bread types.
Some bread makers also have dedicated dough settings that mix and proof dough without baking it. This is particularly useful for making pizza dough, rolls, cinnamon rolls, and other homemade baked goods.
One of the biggest advantages of owning a bread maker is convenience. You can prepare your ingredients, select a program, press start, and let the machine do the work.
Is a Bread Maker Worth Buying?
I think a bread maker is one of the most useful small kitchen appliances if you regularly enjoy homemade bread.
When I first started using a bread machine, I quickly realized how much easier it was to make bread for my family.
Traditional bread making requires several steps. You have to mix the ingredients, knead the dough, allow it to rise, shape it, let it rise again, and bake it.
A bread maker combines most or all of these steps into one appliance.
Here are some reasons I enjoy using a bread machine:
- Convenience: The machine handles mixing, kneading, rising, and baking.
- Less hands-on work: You don’t have to spend time kneading dough or monitoring every stage.
- Fresh bread: You can enjoy homemade bread without making a trip to the grocery store.
- Ingredient control: You choose the flour, oil, sweeteners, salt, and other ingredients.
- Versatility: Many machines can prepare dough for pizza, rolls, and other recipes.
- Consistency: Once you find recipes that work well in your machine, you can repeat them regularly.
For me, the biggest benefit is that I can make homemade bread even when I have a busy household and don’t have time to supervise traditional bread making.
How to Choose the Best Bread Maker
There are many different bread makers available, ranging from inexpensive compact machines to larger models with advanced features.
I’ve tested several different machines, and I’ve learned that the best bread maker depends on how you plan to use it.
Here are some features I recommend considering before purchasing one.
1. Bread Maker Capacity
One of the first things to consider is how much bread you want to make.
Many bread machines make loaves weighing approximately 1 to 2 pounds. Some larger machines can accommodate substantially bigger loaves.
For example, I purchased the Neretva 3.3-pound bread maker because I wanted to make larger batches of bread for my family.
The machine offers three loaf sizes, with the largest setting producing a loaf of up to 1,500 grams.
This is particularly useful if you have a larger household or want to prepare bread for several days.
Watch my unboxing and feature demonstration:
Neretva 3.3 LB Bread Maker Unboxing and Review
Shop the Neretva 3.3 LB Bread Maker >
2. Bread Machine Heating Elements
Another feature worth considering is the heating system.
Many traditional bread machines use a heating element located near the bottom of the baking chamber.
The Neretva 3.3-pound model I tested has dual heating elements. This was one of the features that attracted me to the machine because it provides additional heat distribution around the loaf.
When comparing bread makers, pay attention to the heating design and look at reviews that show actual finished loaves.
3. Bread Pan Material
The bread pan is another important consideration.
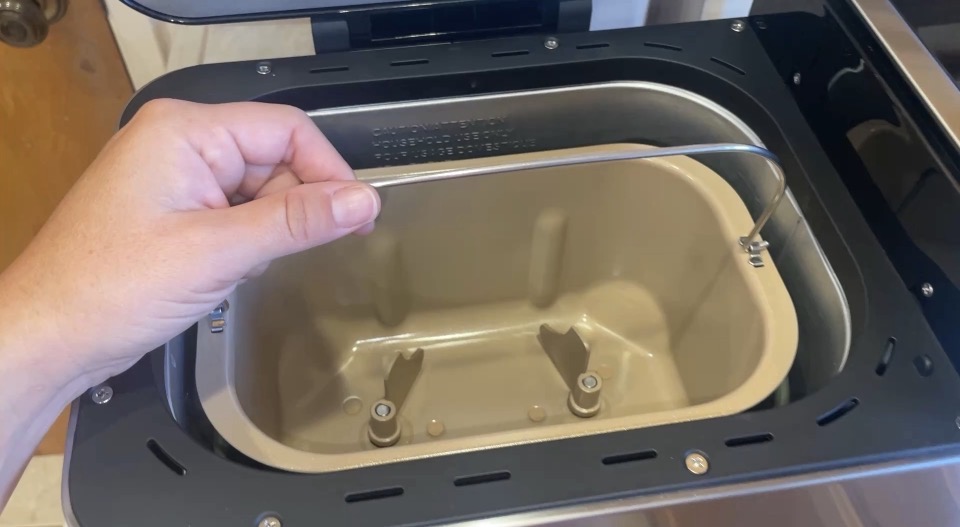
Some bread machines use traditional nonstick-coated pans, while other models offer ceramic-coated baking pans.
I specifically wanted to try a bread maker with a ceramic pan, which was one of the reasons I purchased the Neretva.
The Elite Gourmet model I tested also has a ceramic CERALAST pan.
If pan material is important to you, check the manufacturer’s specifications carefully because different models within the same brand can have different pan materials.
4. Bread Machine Settings
Look at the available programs before purchasing a bread maker.
Common settings include:
- Basic white bread
- Whole wheat bread
- French bread
- Sweet bread
- Quick bread
- Gluten-free bread
- Dough
- Pizza dough
- Cake
- Jam
Some bread machines offer additional custom settings that allow you to adjust kneading, rising, and baking times.
I particularly like having a dough setting because I can use the bread machine to prepare dough and then finish baking it in my oven.
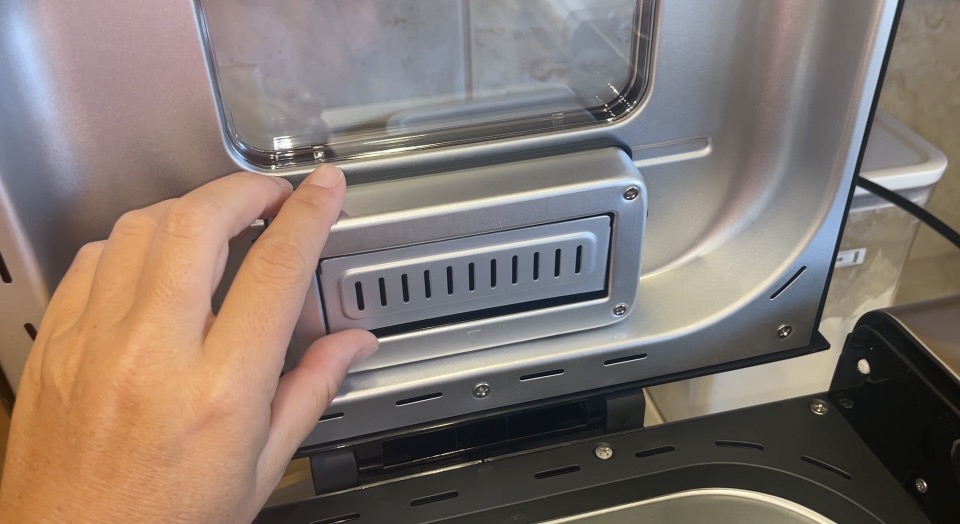
5. Automatic Fruit and Nut Dispenser
If you enjoy making bread with raisins, walnuts, seeds, or other additions, consider a bread maker with an automatic dispenser.
Instead of waiting beside the machine for the appropriate time to add ingredients, you can fill the dispenser before starting the program.
The machine releases the ingredients during the appropriate part of the cycle.
My Neretva bread maker has this feature, which makes it convenient when I’m preparing bread with additional ingredients.
6. Delay Start and Crust Color
Other useful features include a delay-start timer and adjustable crust color.
A delay timer allows you to schedule a bread-making cycle in advance. However, be mindful of ingredients that require refrigeration. I recommend following your machine’s manual and avoiding delayed cycles with perishable ingredients such as fresh milk unless the manufacturer specifically permits it.
Adjustable crust color is useful because some people prefer a lighter crust while others enjoy a darker, crispier exterior.
My Bread Maker Reviews and Comparisons
I’ve tested several bread machines, and each has different advantages.
Neretva 3.3 LB Bread Maker
The Neretva 3.3-pound bread maker is the machine I purchased when I wanted to make larger loaves.
Some of the features I particularly like include:
- Large 3.3-pound maximum loaf capacity
- Ceramic baking pan
- Dual heating elements
- Two kneading paddles
- Automatic fruit and nut dispenser
- Digital control panel
- Viewing window
- Multiple bread and dough programs
One thing I discovered is that installing the large bread pan requires a little attention. The bottom connections need to be aligned properly before the pan is seated.
It’s also important to understand that a larger loaf requires appropriately scaled recipes. You shouldn’t simply use a smaller machine’s recipe without checking the ingredient quantities and the manufacturer’s capacity recommendations.
Watch my one-month review to see my actual experience using this machine.
Neretva Bread Machine: One-Month Review, Pros and Cons
Shop the Neretva 3.3 LB Bread Maker >
Panasonic Bread Maker
I’ve also used a Panasonic bread machine, including the SD-R2550.
One thing I appreciate about Panasonic is the variety of programs and the ability to prepare different types of bread and dough.
I originally purchased an older Panasonic bread machine secondhand and enjoyed using it so much that I eventually purchased a newer model.
My Panasonic experience has also helped me compare different bread machine designs and understand which features are important for everyday baking.
Watch my unboxing and demonstration:
Panasonic SD-R2550 Bread Maker Unboxing, Review and Sandwich Bread
Shop the Panasonic SD-R2550 Bread Maker >
Elite Gourmet Bread Maker
If you’re looking for a more budget-friendly bread maker, the Elite Gourmet is another machine I’ve tested.
I purchased this model partly because I wanted to try a less expensive bread machine with a ceramic baking pan.
It offers a smaller maximum loaf size than the Neretva 3.3-pound machine, making it worth considering if you don’t need to bake such large quantities.
I also tested it against my Panasonic bread machine to compare their performance.
Watch my Elite Gourmet vs. Panasonic Bread Maker Comparison:
Shop the Elite Gourmet Ceramic Bread Maker >
How to Use a Bread Maker
If you’ve never used a bread maker before, the process is surprisingly simple.
Although different machines have different controls and programs, most follow the same basic process.
Step 1: Add Your Ingredients
Start by removing the bread pan from the machine.
Add your ingredients in the order recommended by your bread maker’s manual.
Some machines recommend adding liquids first, followed by dry ingredients, with yeast added last.
This helps keep the yeast separate from the liquid and salt until the kneading cycle begins.

Step 2: Select Your Bread Program
Place the bread pan into the machine and secure it properly.
Choose the appropriate bread program based on the recipe.
For example, a basic white bread recipe will usually use the basic setting.
Step 3: Choose Your Loaf Size and Crust Color
If your bread machine offers different loaf sizes, select the size that matches your recipe.
You can also select your preferred crust color if that option is available.
Step 4: Press Start
Close the lid and start the machine.
The bread maker will mix the ingredients, knead the dough, allow it to rise, and bake the loaf according to the selected program.
Step 5: Remove the Bread and Let It Cool
When the cycle is complete, carefully remove the hot bread pan using oven mitts.
Remove the loaf from the pan and allow it to cool before slicing.
I know it’s tempting to slice into a freshly baked loaf immediately, but allowing the bread to cool helps the interior finish setting and makes slicing easier.
My Favorite Homemade Bread Recipes for a Bread Maker
One of the best reasons to own a bread maker is how many different recipes you can prepare.
You aren’t limited to basic white bread.
Here are two simple recipes from my bread-making demonstrations.
Large Homemade Sandwich Bread Recipe
This is one of my favorite recipes for the Neretva 3.3-pound bread maker.
It’s a large, slightly sweet sandwich loaf that works well for everyday sandwiches and meal preparation.
Ingredients:
- 390 ml milk (I used unsweetened, non-dairy soy beverage)
- 70 ml olive oil
- 1 teaspoon salt
- 100 grams sugar
- 760 grams bread flour
- 2 teaspoons active dry yeast
Equipment and ingredients I used:
- Neretva 3.3 LB Bread Maker
- Bob’s Red Mill Active Dry Yeast
- 365 Organic Bread Flour
- Atlas Organic Extra Virgin Olive Oil
Directions:
- Add the milk to the bread pan.
- Add the olive oil, salt, and sugar.
- Add the bread flour.
- Add the active dry yeast last.
- Place the pan into the bread maker.
- Select the basic bread setting.
- Choose the light crust setting and the 1,500-gram loaf size.
- Press start.
The machine handles the mixing, kneading, rising, and baking.
In my demonstration, the cycle took approximately 3 hours and 15 minutes.
The finished bread has a soft, springy interior and makes a substantial sandwich loaf.
Watch the full recipe demonstration:
Simple Homemade French Bread Recipe
This is another recipe I enjoy making in a bread machine.
It’s a basic everyday bread that uses only a handful of ingredients.
Ingredients:
- 400 grams flour
- 300 grams water
- 10 grams salt
- 3 grams active dry yeast
Directions:
- Place the bread pan on a digital kitchen scale and tare it.
- Add the flour.
- Add the salt.
- Add the water.
- Add the yeast according to your bread machine’s recommended ingredient order.
- Select the basic bread program.
- Choose your preferred crust color.
- Press start.
The Panasonic bread machine handles the mixing, kneading, proofing, and baking.
This is a great example of how simple homemade bread can be when you have the right equipment.
Watch my Panasonic bread-making demonstration:
Why I Use a Kitchen Scale for Bread Making
One of my biggest recommendations for anyone learning to make homemade bread is to use a digital kitchen scale.
Bread recipes can be sensitive to ingredient measurements, particularly flour.
Measuring flour by volume can introduce inconsistencies because the amount of flour in a measuring cup changes depending on how tightly it is packed.
Measuring in grams gives you a much more consistent starting point.
I use a digital kitchen scale when making my larger bread machine recipes because it makes measuring ingredients much easier.
For bread machine baking, I recommend:
- Weighing flour whenever possible.
- Measuring liquids accurately.
- Following the recipe’s yeast measurements.
- Keeping track of any adjustments you make.
- Recording the settings that produce your favorite results.
Once you find a recipe that works well in your machine, you can repeat it with much more confidence.
Can You Make Dough in a Bread Maker?
Absolutely!
In fact, one of my favorite ways to use a bread maker is to prepare dough without baking it in the machine.
Most bread machines have a dedicated dough setting.
This program mixes and kneads the ingredients and allows the dough to rise. When the cycle is finished, you remove the dough and shape it however you like.
You can use this dough for:
- Pizza
- Dinner rolls
- Cinnamon rolls
- Focaccia
- Breadsticks
- Homemade sandwich rolls
I especially enjoy using the dough setting because it eliminates much of the hands-on work involved in traditional bread making.
I also use my bread machine for pizza dough meal preparation.
Watch my bread machine dough demonstration:
Bread Machine Tips for Better Homemade Bread
Even though bread machines make baking easier, there are a few things you should understand to get good results.
Use the Correct Ingredient Order
Always check your bread machine manual for the recommended ingredient order.
Many recipes call for liquids first, followed by dry ingredients, with yeast added last.
This helps prevent the yeast from activating prematurely.
Use the Correct Flour
Different types of flour absorb water differently.
Bread flour generally has a higher protein content than all-purpose flour, which can help produce a stronger dough structure.
You can also experiment with whole wheat flour, but whole wheat recipes may require different liquid ratios and settings.
Check Your Yeast
Expired or inactive yeast can cause bread to rise poorly.
Store yeast according to the manufacturer’s instructions and check its expiration date.
If you are having trouble getting your bread to rise, yeast activity is one of the first things I would investigate.
Don’t Open the Lid During Baking
Try to avoid opening your bread maker while the loaf is baking.
Opening the lid releases heat and can interfere with the baking process.
Some machines have viewing windows, which allow you to monitor the bread without opening the lid.
Let Your Bread Cool
Always use caution when removing freshly baked bread.
The pan and loaf will be extremely hot.
Allow the bread to cool before slicing for better texture and easier cutting.
Common Bread Maker Problems
Here are a few common problems you might experience when using a bread machine.
Why didn’t my bread rise?
Possible causes include inactive yeast, incorrect ingredient measurements, or unsuitable liquid temperatures.
Why is my bread dense?
Too much flour, insufficient liquid, inactive yeast, or an unsuitable flour-to-liquid ratio can produce dense bread.
Why did my bread collapse?
Excessive liquid, too much yeast, or overproofing can contribute to a collapsed loaf.
Why is my bread too dark?
Check your crust-color setting and make sure you are using the correct program for your recipe.
Why is there a hole in the bottom of my bread?
The kneading paddle sits inside the bread pan during the mixing process. When you remove the loaf, the paddle can leave an indentation or hole in the bottom.
This is normal for many bread machines.
Can You Make Sourdough in a Bread Maker?
You can use a bread machine to help prepare sourdough, although the process depends on the machine and the recipe.
Some machines offer dedicated sourdough programs, while others can be used for kneading and proofing dough.
I’ve experimented with sourdough using my Neretva bread machine and have also used it to help proof refrigerated sourdough dough.
If you’re interested in learning more, watch my sourdough bread machine tutorial.
Sourdough in a Bread Machine: From Starter to Homemade Bread
I also use a beginner-friendly freeze-dried sourdough starter kit in this demonstration.
Shop My Rustic Roots Sourdough Starter
For sourdough baking, I also use:
Remember that traditional sourdough fermentation takes longer than a typical automatic bread machine cycle. Follow a recipe designed for the machine rather than assuming the basic bread program will produce the same result.
Frequently Asked Questions About Bread Makers
What is the difference between a bread maker and a bread machine?
There is no meaningful difference. Bread maker and bread machine are two common names for the same appliance.
Is homemade bread cheaper than store-bought bread?
It can be, depending on the ingredients you purchase, the size of your loaves, and the type of bread you normally buy.
Making bread at home also gives you more control over the ingredients.
How long does it take to make bread in a bread maker?
Most standard bread machine programs take approximately three to five hours. Quick programs may take less time, while specialty recipes can take longer.
Always check the timing for your specific machine and program.
Can you use all-purpose flour in a bread maker?
Yes. Many bread machine recipes work with all-purpose flour.
However, bread flour has a higher protein content and may produce a different texture. Follow the flour recommendations for your recipe.
Can you make pizza dough in a bread maker?
Yes! Most bread machines have a dough setting that can be used to prepare pizza dough.
You can remove the dough when the cycle finishes, divide it into portions, and shape it for baking.
What size bread maker should I buy?
That depends on how much bread you plan to make.
A smaller 1- or 2-pound machine may be sufficient for individuals and smaller households. Larger families may appreciate a machine that accommodates bigger loaves.
Do bread makers bake the bread automatically?
Yes. Most standard bread programs mix, knead, proof, and bake the bread automatically.
Some machines also have dough-only programs that stop before baking.
Is a bread maker worth it for beginners?
I think bread makers are especially useful for beginners because they simplify many of the steps involved in making bread.
You can start with basic recipes and gradually experiment with different flours, ingredients, and dough settings.
Final Thoughts: Making Homemade Bread Easier
I really enjoy having a bread maker in my kitchen because it makes homemade bread much more practical for everyday life.
Whether you’re interested in making fresh sandwich bread, experimenting with whole wheat flour, preparing pizza dough, or trying sourdough, a bread machine can help simplify the process.
After testing several different bread makers, I’ve learned that there isn’t necessarily one perfect machine for everyone.
Consider how much bread you want to make, which settings you’ll use, the pan material, and whether features like a dough cycle or automatic dispenser are important to you.
If you’re just getting started, I recommend choosing a simple bread recipe, following your machine’s manual, and experimenting until you find a loaf your household enjoys.
For more bread machine recipes, reviews, and tutorials, visit my Bread Machine Recipes & Tutorials YouTube Playlist.
Happy baking!
Pin this post on Pinterest: